

Your mountain bike’s chain tension plays a vital role in delivering a smooth and efficient ride. Properly adjusted, it enhances performance, reduces wear on components, and prevents potential mishaps on the trails.
In this comprehensive guide on how to adjust the chain on a mountain bike, we’ll navigate through the steps to achieve the optimal balance between tension and movement.
Regular chain adjustments are a fundamental aspect of bike maintenance. A well-maintained chain not only ensures reliable shifting but also extends the lifespan of the drivetrain. Riding with an excessively loose or tight chain can lead to premature wear on cassette cogs and chainrings, affecting overall performance.
In the sections to follow, we’ll explore the step-by-step process of adjusting your mountain bike’s chain tension. From evaluating the correct tension to making precise adjustments, this guide equips you with the knowledge and skills to maintain your bike’s chain at its best, ensuring a smoother and more enjoyable mountain biking experience.
Read More: How to adjust gear shifter on a mtb
Understanding Chain Tension: Why It Matters
In the intricate machinery of a mountain bike, even the humblest of components plays a pivotal role in delivering a seamless and exhilarating ride. One such essential element is the chain, the link that transfers your power to the wheels, propelling you forward through rugged trails and challenging terrain.
The significance of proper chain tension goes beyond the realm of mechanics – it directly impacts your biking experience, performance, and even safety.
- Power Transmission and Efficiency:
Understanding chain tension starts with recognizing its role in power transmission. A properly tensioned chain optimizes energy transfer from your pedaling to the bike’s movement.
When the chain is too loose, power is lost as it slips on the chainrings and cassette cogs. Conversely, an overly tight chain increases resistance, making pedaling feel cumbersome.
- Smooth Shifting and Gear Changes:
A well-tensioned chain is pivotal for smooth and precise shifting. Inconsistent tension can lead to missed shifts, noisy gear changes, and even chain drops. Proper tension ensures that the chain engages cleanly with the chainrings and cogs, facilitating seamless transitions between gears.
- Drivetrain Longevity:
Chain tension directly impacts the longevity of your drivetrain components, including chainrings, cassette cogs, and derailleurs. An overly tight chain places excessive stress on these components, leading to premature wear.
Conversely, a loose chain increases the risk of chain slippage, which can cause damage and reduce the lifespan of your drivetrain.
- Safety and Riding Experience:
Maintaining proper chain tension contributes to your safety on the trails. An excessively loose chain can unexpectedly disengage from the drivetrain, causing accidents and mishaps.
Riding with an optimally tensioned chain ensures a secure connection between your pedaling efforts and the bike’s movement, enhancing control and overall riding experience.
- Finding the Balance:
Achieving the right chain tension involves striking a delicate balance. A correctly tensioned chain should have a slight amount of play – about 0.5 to 1 inch of vertical movement when pressing down on it.
This balance ensures optimal power transfer while avoiding excessive strain on the drivetrain.
In conclusion, understanding chain tension goes beyond mechanics; it’s about unlocking the potential of your mountain bike. From smoother shifting to efficient power transfer and extended component life, proper chain tension enhances every aspect of your riding experience.
By appreciating its significance and learning how to achieve the ideal tension, you’re not just maintaining your bike – you’re elevating your performance, safety, and enjoyment on the trails.
Read More: How to works gears on a mountain bike
Essential Tools for Chain Adjustment

Maintaining your mountain bike’s chain tension is a task that requires precision and the right tools. With the right equipment at hand, you’ll be well-equipped to ensure optimal performance and longevity for your bike’s drivetrain.
In this guide, we’ll explore the essential tools you need for effective chain adjustment, empowering you to keep your bike in top shape for your next trail adventure.
- Chain Checker
A chain checker, also known as a chain wear gauge, is a fundamental tool for assessing chain wear. It helps you determine if your chain has stretched beyond its usable life, indicating the need for replacement. Regular use of a chain checker prevents excessive wear on your cassette cogs and chainrings.
- Allen Wrench Set
An Allen wrench set is essential for various bike maintenance tasks, including adjusting rear wheel placement and tension. Choose a set with a range of sizes to ensure compatibility with different components on your bike.
- Adjustable Wrench
An adjustable wrench is versatile and can be used for tasks such as loosening and tightening nuts and bolts on your bike. Opt for a quality wrench with a comfortable grip for easy handling.
- Chain Tool
A chain tool, also known as a chain breaker, is used to remove and install chain links. This tool is crucial for resizing your chain if you need to replace it or adjust its length.
- Pliers
Pliers come in handy for various tasks, including holding cables while adjusting tension and securing small components. Needle-nose pliers are particularly useful for reaching tight spots.
- Chain Lubricant
While not a traditional tool, chain lubricant is a must-have for maintaining your chain’s performance. Regularly applying lubricant keeps the chain running smoothly and prevents premature wear.
- Torque Wrench
A torque wrench is crucial for accurately tightening bolts to manufacturer-recommended specifications. Over-tightening bolts can damage components, while under-tightening can compromise safety.
- Work Stand
While not a handheld tool, a work stand provides a stable platform for bike maintenance. It elevates the bike to a comfortable height, allowing you to work more efficiently on various tasks, including chain adjustment.
- Rag or Shop Towel
Having a clean rag or shop towel on hand is essential for wiping down components and cleaning excess lubricant during the chain adjustment process.
- Safety Gear
Safety should always be a priority. Wear gloves and eye protection to prevent injuries while working on your bike.
By assembling these essential tools, you’re setting yourself up for success in maintaining your mountain bike’s chain tension. With the right equipment and knowledge, you’ll be able to fine-tune your bike’s drivetrain, ensuring a smooth and enjoyable ride on the trails while extending the lifespan of your components.
Read More: Is biking good for knee pain
Evaluating Chain Tension: Finding the Right Balance
In the intricate interplay of your mountain bike’s components, chain tension stands as a crucial factor that bridges power transfer, shifting precision, and overall riding experience. The art of evaluating chain tension requires an understanding of the delicate balance that ensures optimal performance and longevity.
- The Chain’s Role
The chain is the conduit through which your pedaling force is translated into forward motion. Too tight, and it causes unnecessary strain on the drivetrain; too loose, and it risks slipping off the cogs.
Achieving the right tension is about striking the balance between efficiency and safety.
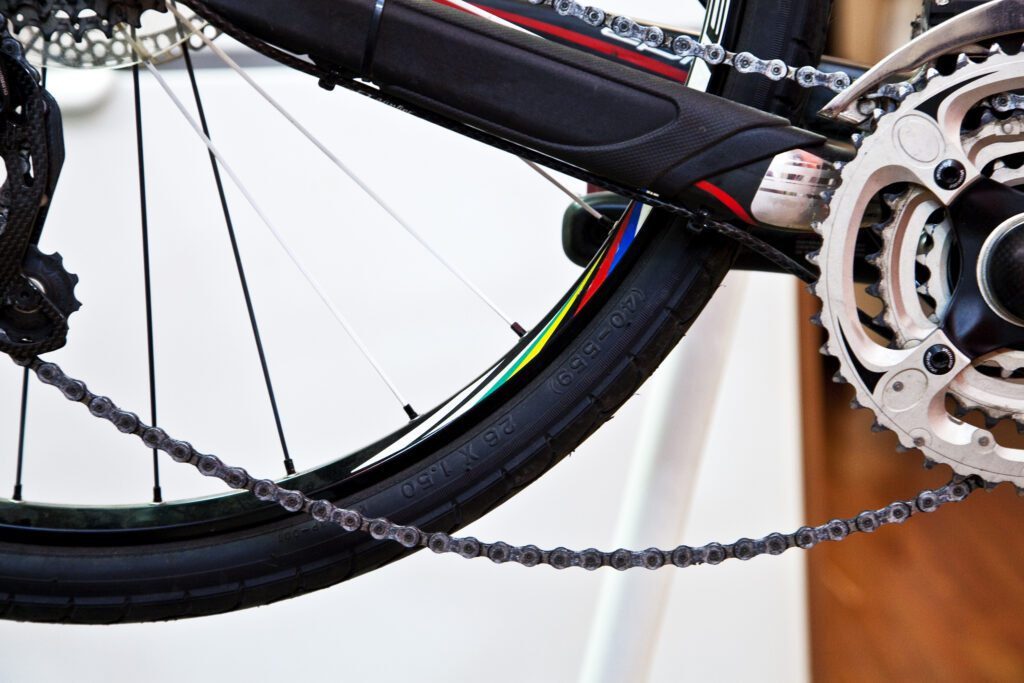
- The “Play” Test
A simple test involves gently pressing down on the chain at the midpoint between the front and rear chainrings. Ideally, you should observe a slight movement of about 0.5 to 1 inch. This play indicates a balanced tension that accommodates power transmission without undue stress.
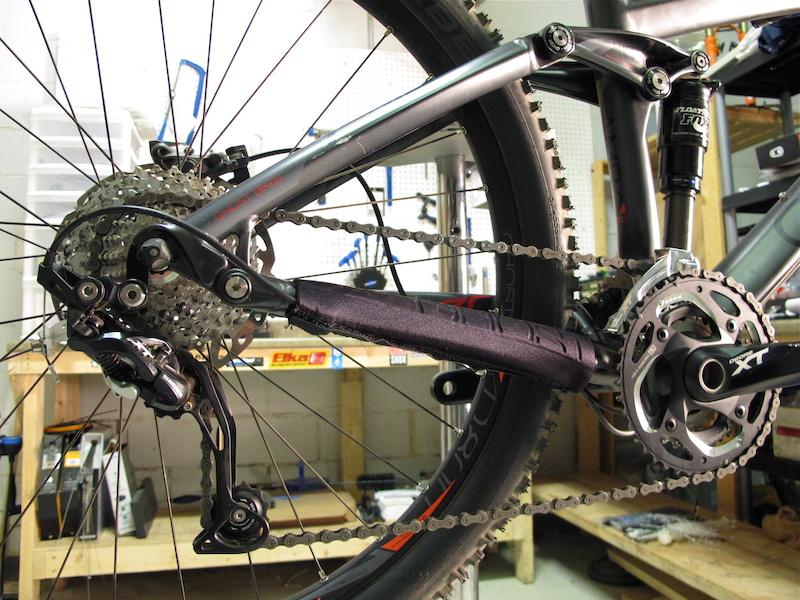
- Visual Inspection
Visually inspect the chain tension while the bike is on a stand. Look for signs of excessive sagging or chain tightness. The chain should neither sag excessively nor appear overly taut.
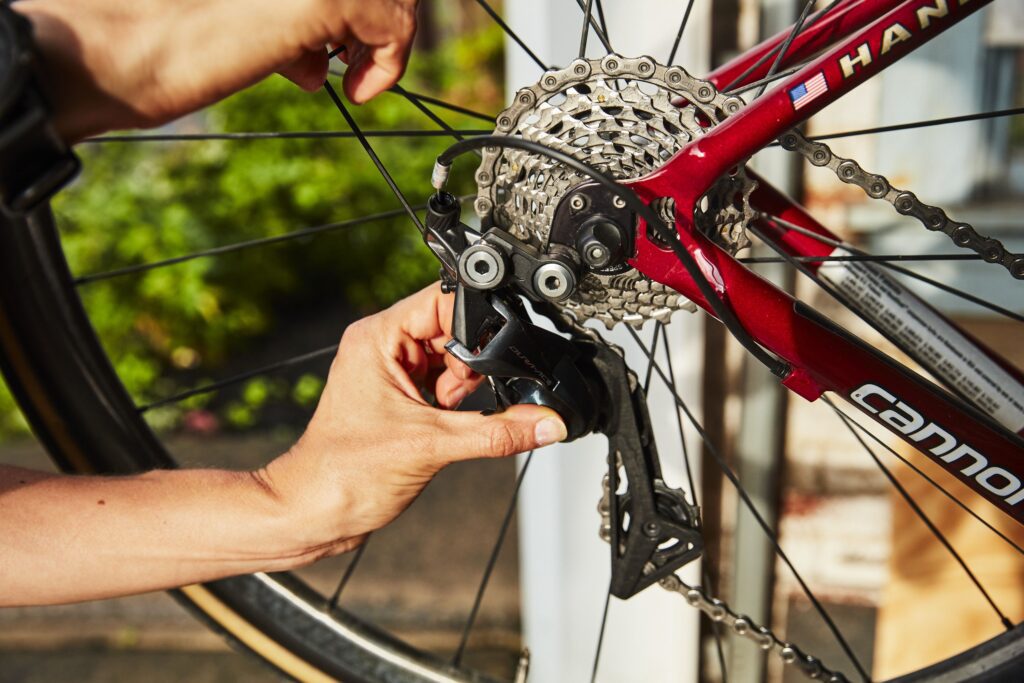
- Pedal Backwards Test
With your bike on the stand, rotate the cranks backward. Observe the movement of the chain on the jockey wheels of the rear derailleur. The chain should move smoothly without hesitation, yet it shouldn’t appear slack or bounce excessively.
- Shifting Behavior
Evaluating chain tension involves considering the behavior during gear shifts. If shifts are noisy or hesitant, it might indicate incorrect tension. Smooth shifting indicates that the chain engages well with the chainrings and cassette cogs.
- Chain Wear Consideration
As chains wear over time, they elongate. Regularly checking your chain for wear using a chain checker is vital. A worn chain can affect tension accuracy and compromise the longevity of your drivetrain components.
- Optimal Tension Goals
The goal of evaluating chain tension is to strike a balance between tightness and play. Avoid over-tightening, which increases stress on components, and steer clear of excessive sagging, which can lead to chain disengagement during riding.
In conclusion, evaluating chain tension requires a holistic approach that considers power transfer, shifting precision, and component longevity. By understanding the indicators of optimal tension and regularly performing checks, you ensure a smooth and efficient ride while safeguarding your bike’s drivetrain.
This art of balance is not just a mechanical skill; it’s a testament to your commitment to the artistry of riding.
Loosening the Rear Wheel: Creating Space for Adjustment
In the symphony of maintaining your mountain bike, the process of loosening the rear wheel emerges as a pivotal act, opening the gateway for precise chain tension adjustments. Mastering this step is crucial for ensuring optimal power transmission and a smooth, efficient ride.
- Safety First
Before you embark on loosening the rear wheel, ensure your bike is secure on a stable stand or surface. Safety glasses and gloves are recommended to protect against any potential hazards.
- Quick Release vs. Thru-Axle
Identify whether your bike employs a quick-release mechanism or a thru-axle system. Quick releases involve a lever that releases tension, allowing you to open the axle and remove the wheel. Thru-axles require unscrewing to release tension.
- Shift to Smallest Gear
Shift the rear derailleur to the smallest gear, alleviating pressure on the chain and creating slack. This step eases the process of removing and reinstalling the rear wheel.
- Quick Release Process
If your bike features quick releases, open the lever to release tension. Gently slide the wheel out of the dropouts, creating enough space to access the chain tension adjustment points.
- Thru-Axle Process
For bikes with thru-axles, use an appropriate tool to unscrew the axle from the frame. Once the axle is loosened, slide the wheel out of the dropouts, maintaining awareness of any washers or spacers in the process.
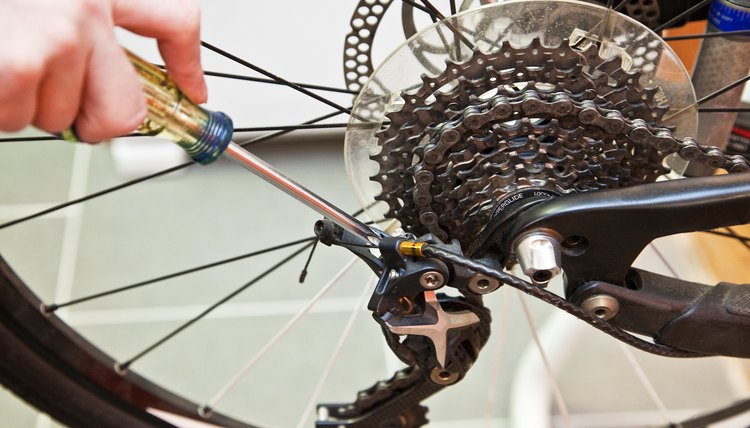
- Chain Tension Adjustment
With the rear wheel loosened and removed, you gain access to the chain tension adjustment points. Use the appropriate tools to fine-tune the tension according to your bike’s specifications.
- Realign and Secure
After making the necessary chain tension adjustments, slide the rear wheel back into the dropouts. Ensure that the wheel is centered and aligned with the frame. For quick releases, close the lever, and for thru-axles, screw the axle back in securely.
- Check Alignment and Tension
Double-check the alignment of the rear wheel to ensure it sits squarely within the dropouts. Verify that the chain tension is within the recommended range by performing the “play” test.
- Test Ride
Before embarking on your trail adventure, take your mountain bike for a short test ride to ensure that the chain tension adjustment has been executed effectively. Listen for any unusual noises and feel the changes in power transmission.
- Regular Maintenance
Regularly loosening the rear wheel for chain tension adjustments is an essential aspect of bike maintenance. Incorporate it into your routine to maintain optimal performance and component longevity.
In the choreography of bike maintenance, the act of loosening the rear wheel is a key step that enables the dance of precise chain tension adjustments. By mastering this process, you ensure that every pedal stroke propels you towards an experience that’s efficient, smooth, and exhilarating on the trails.
Making Adjustments: Loosening or Tightening the Chain
In the intricate choreography of mountain bike maintenance, the art of adjusting chain tension takes center stage. Balancing between the need for optimal power transmission and avoiding undue stress, mastering chain adjustments ensures a ride that’s smooth, efficient, and responsive.
- Assessing Initial Tension
Before making any adjustments, evaluate the current chain tension. The goal is to find the sweet spot between a chain that’s too tight and one that’s overly loose. The chain should exhibit a slight vertical play of about 0.5 to 1 inch.
- Loosening the Chain
To loosen the chain, follow these steps:
Loosen the rear wheel using the appropriate method, creating slack in the chain.If the chain is too tight, open the chain tension adjustment points, often located on the rear dropouts.
Gently pull the rear wheel backward to introduce more slack, thereby loosening the chain.Realign the wheel and secure it in place.
- Tightening the Chain
To tighten the chain, follow these steps:
Loosen the rear wheel using the appropriate method to create space for adjustments.
If the chain is too loose, open the chain tension adjustment points.
Push the rear wheel forward to reduce the slack and tighten the chain.
Maintain a balanced tension on both sides for even wear.
Realign the wheel and secure it in place.
- Finding the Balance
Whether you’re loosening or tightening the chain, maintaining balance is key. A chain that’s excessively tight can stress the drivetrain components, while one that’s too loose risks disengagement during riding.
- Regular Checks
Regularly assess your chain’s tension to prevent wear and ensure consistent performance. Frequent rides, especially on rugged terrain, can lead to changes in tension.
- Effects on Shifting
The adjustments you make can impact shifting performance. Fine-tune your chain tension to find the optimal balance between smooth shifts and power transfer.
- Test Ride
After making adjustments, take your mountain bike for a short test ride. Pay attention to how the chain responds during gear changes, pedal strokes, and maneuvers.
- Document Changes
Keep track of the adjustments you’ve made for future reference. This documentation can help you identify trends and patterns in chain tension changes.
- Seek Professional Help
If you’re uncertain about making adjustments, or if you encounter complex issues, consulting a professional bike mechanic can provide valuable insights and assistance.
- Part of the Dance
Adjusting chain tension is a fundamental step in the rhythm of bike maintenance. By mastering this skill, you’re ensuring that your mountain bike is ready to perform at its best, gliding through trials with a harmonious blend of power, control, and responsiveness.
Realigning the Rear Wheel: Ensuring Proper Alignment
In the intricate choreography of mountain bike maintenance, realigning the rear wheel emerges as a pivotal act, ensuring that your bike’s drivetrain functions optimally and rides with precision. Mastering this step is crucial for a ride that’s not only smooth but safe.
- Importance of Alignment
Proper alignment of the rear wheel is essential for several reasons. It directly affects chain tension, gear shifting, and overall riding experience. Misalignment can lead to poor power transfer, chain skipping, and uneven wear on drivetrain components.
- Identifying Misalignment
Visual cues and performance issues can indicate misalignment. Look for discrepancies in wheel positioning between the frame’s chainstays and seatstays. If your bike veers to one side while riding or your chain frequently skips, misalignment might be the cause.
- Safety Precautions
Before you begin realigning the rear wheel, ensure that your bike is securely placed on a stable stand or surface. Safety glasses and gloves are recommended for protection.
- Loosening the Quick Release or Thru-Axle
Depending on your bike’s mechanism, loosen the quick release lever or unscrew the thru-axle to allow the rear wheel to move.
- Realigning the Wheel
Gently push or pull the rear wheel in the necessary direction to achieve alignment. Ensure that the wheel is centered between the chainstays and seatstays, maintaining equal spacing on both sides.
- Visual Reference
Use the brake pads as a visual reference point for wheel alignment. The gap between each brake pad and the rim should be consistent on both sides.
- Chain Tension Consideration
As you realign the rear wheel, be mindful of chain tension. Ensure that the chain maintains its previously adjusted tension while realigning the wheel.
- Double-Check Alignment
After making adjustments, double-check the alignment by standing behind the bike and assessing the position of the wheel relative to the frame.
- Test Ride
Take your mountain bike for a test ride to assess how the realigned wheel performs. Pay attention to shifts, pedaling efficiency, and any unusual noises.
- Regular Maintenance
Regularly inspect and realign your rear wheel to prevent misalignment-related issues. Frequent rides on challenging terrains can lead to subtle shifts over time.
- Seek Professional Help
If you encounter persistent alignment issues or if you’re unsure about realigning the rear wheel, consider seeking assistance from a professional bike mechanic.
- Part of the Precision
Realigning the rear wheel is a critical step in the dance of bike maintenance. By mastering this skill, you’re ensuring that your mountain bike’s drivetrain operates harmoniously, translating every pedal stroke into a fluid and controlled ride on the trails.
Lubricating the Chain: Enhancing Performance and Longevity

In the intricate world of mountain bike maintenance, one choreography that cannot be overlooked is the act of lubricating the chain. Beyond a mere task, this ritual holds the power to elevate your bike’s performance, extend component life, and amplify the joy of every ride.
- The Role of Chain Lubrication
Lubricating the chain serves as a guardian of performance and longevity. It reduces friction between chain links and cogs, minimizing wear and enhancing power transfer, shifting, and overall riding experience.
- Choosing the Right Lubricant
Select a lubricant specifically designed for bicycle chains. Consider factors like riding conditions, weather, and frequency of rides when choosing between wet and dry lubricants.
- Clean Before Lubricating
Before applying lubricant, ensure your chain is clean. Use a chain cleaner, brushes, or a clean rag to remove dirt, grime, and old lubricant. A clean chain allows the lubricant to penetrate more effectively.
- Applying Lubricant
Apply lubricant to the inner side of the lower chain while turning the pedals backward. One drop per link is usually sufficient. Avoid over-application, as excess lubricant can attract dirt and create a messy buildup.
- Allow Penetration
After applying the lubricant, give it a few minutes to penetrate the chain’s internal components. This ensures that the lubricant spreads evenly and provides effective protection.
- Wipe Off Excess
After allowing the lubricant to penetrate, use a clean rag to wipe off excess lubricant from the chain’s outer surface. This prevents excessive dirt buildup during rides.
- Focus on Moving Parts
Apart from the chain, apply lubricant to moving parts such as derailleur pivots, brake and derailleur cables, and pulleys. This enhances overall bike performance and shifting precision.
- Regularity and Riding Conditions
The frequency of lubrication depends on your riding conditions. For wet or muddy conditions, more frequent lubrication might be necessary. In drier conditions, lubricating every 100-200 miles is generally sufficient.
- Avoid Over-Lubricating
While lubrication is essential, avoid over-lubricating. Excessive lubricant can attract dirt and debris, leading to a messy and less efficient drivetrain.
- Clean and Reapply
With each application of lubricant, remember to follow the process of cleaning, allowing penetration, and wiping off excess. Regular maintenance ensures consistent performance.
- Test Ride and Enjoy
After lubricating the chain, take your mountain bike for a test ride. Feel the difference in smoothness, shifting accuracy, and overall responsiveness.
- Ritual of Care
Lubricating the chain is more than a task; it’s a ritual of care that breathes life into your mountain bike. By nurturing your bike’s heart, you’re embracing the art of precision, performance, and longevity, ready to conquer trails with every pedal stroke.
Test Ride and Fine-Tuning: Ensuring a Smooth Ride

As you embark on the journey of mountain bike maintenance, the test ride and fine-tuning phase emerges as a crescendo, where the culmination of adjustments and care comes to life. This phase is the bridge between mechanics and experience, where the intricate choreography of adjustments meets the thrill of a smooth and exhilarating ride.
- The Significance of Testing
A test ride isn’t just a formality; it’s the moment of truth where you validate the effectiveness of your adjustments. It’s a sensory experience that reveals how well your mountain bike responds to your touch, power, and intentions.
- Prepare for the Ride
Before setting off, ensure your bike is in proper condition. Double-check that all adjustments, such as chain tension and wheel alignment, have been executed accurately.
- Start with Familiar Terrain
Begin your test ride on familiar terrain – a trail you know well. This provides a baseline for assessing the impact of your adjustments on the bike’s performance.
- Pay Attention to Shifting
During your ride, shift through various gears to assess the responsiveness and accuracy of gear changes. Listen for any noise or hesitation in the shifting process.
- Observe Power Transfer
Feel the power transfer as you pedal. Notice how efficiently your energy is translated into forward motion. A well-adjusted drivetrain should feel smooth and responsive.
- Listen for Noises
Listen carefully for any unusual noises, such as rattling, clicking, or rubbing. Unusual sounds might indicate that certain components require further attention.
- Evaluate Chain Behavior
Pay attention to how the chain engages with the chainrings and cassette cogs. Note whether there’s any skipping or slipping, which might indicate improper chain tension or alignment.
- Fine-Tuning
If you notice any issues during the test ride, don’t be discouraged. Fine-tuning is part of the process. Once you’re back from the ride, make any necessary adjustments based on your observations.
- Document Observations
Keep a mental or written note of your observations during the test ride. This information will guide your future maintenance and adjustments.
- Iterative Process
Remember that fine-tuning is often an iterative process. It might take a few test rides and adjustments to achieve the optimal performance and comfort level.
- The Joy of Mastery
As you embark on your test ride and fine-tuning journey, relish the experience of being in tune with your bike. Each adjustment you make and observation you note is a step toward mastering the art of mountain bike maintenance – a journey where mechanics and intuition intertwine, resulting in the joy of a ride that’s not just smooth but sublime.
Conclusion:
Embarking on the quest to adjust the chain on a mountain bike is more than a mechanical endeavor – it’s a journey into the artistry of riding. Through understanding chain tension, acquiring essential tools, evaluating tension, and fine-tuning every component, you’ve honed the skills that fuse mechanics with intuition.
As you navigate the process of loosening the rear wheel, realigning it for proper alignment, lubricating the chain for enhanced performance, and conducting test rides to fine-tune adjustments, you’ve embraced the heart of mountain bike maintenance.
The rhythm of precision and passion harmoniously intertwines in every turn of the pedals.
By honing these skills, you’re not just maintaining a machine; you’re cultivating a symbiotic relationship between you and your bike. This synergy is the essence of mountain biking – the exhilaration of a responsive and well-adjusted bike propelling you through nature’s trails.
So, let this knowledge guide you forward as you confidently step into each maintenance session. Remember that mastering how to adjust the chain on a mountain bike isn’t merely about mechanics; it’s about transforming each ride into a symphony of power, control, and exhilaration. With each adjustment, you’re crafting an experience that’s as unique as the trail ahead.
FAQs:
How tight should your mountain bike chain be?
Your mountain bike chain should have a slight play of about 0.5 to 1 inch when gently pressed in the middle, ensuring optimal tension for efficient power transfer.
How do you check chain tension on a mountain bike?
To check chain tension on a mountain bike, gently press down on the chain midway between the front and rear chainrings. Ideally, there should be about 0.5 to 1 inch of play.
Why is my mountain bike chain loose?
A mountain bike chain can become loose due to wear, improper installation, or lack of maintenance. Regular checking and adjusting of chain tension are important for optimal performance.
How do I fix my bike chain slack?
To fix bike chain slack, loosen the rear wheel, adjust chain tension using the tension adjustment points, and then re-align the wheel properly before securing it in place.
How do I know if my chain is tight enough?
You can determine if your chain is tight enough by gently pressing down on it midway between the front and rear chainrings. Ideally, there should be about 0.5 to 1 inch of play.

Welcome to Bikegenics, where passion meets performance! We are a leading online destination for all things related to mountain biking, dedicated to providing you with top-notch gear, expert advice, and an immersive community to fuel your two-wheeled adventures. With a commitment to excellence and a deep love for the sport, we strive to elevate your biking experience to new heights.